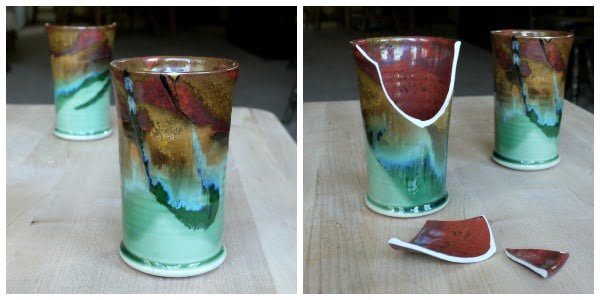
Ever break a memory? Last week, I did – and this week I put it back together in a whole new way. A few years ago, my husband and I bought a beautiful set of pottery cups at a little place on Orcas Island up in the Puget Sound, and every time we used them, they reminded us of that lovely week we spent camping and kayaking in the San Juan Islands.
Until last week, when I knocked one of our cups off the counter and broke it. At first, I thought I would just glue it back together, but one large chip was completely missing, so I sadly threw the pieces into our bathroom garbage can. They sat there for two days before I retrieved them to give them a second life.
How to make a Mosaic Picture Frame
When a special piece of glass or pottery breaks, it’s easy to give it new life as a tiled mosaic – on a frame, a tabletop, a serving tray, or just about anything. Our cup was just the right size to cover a 5×7 picture frame. Materials:
- Picture frame (I saved this one from the recycling bin.)
- Old plate, cup, etc (something to smash)
- Ready-to-Use Adhesive & Grout (This stuff can be bought in quarts at any home improvement store. I like using an all-in-one product – it keeps things simple.)
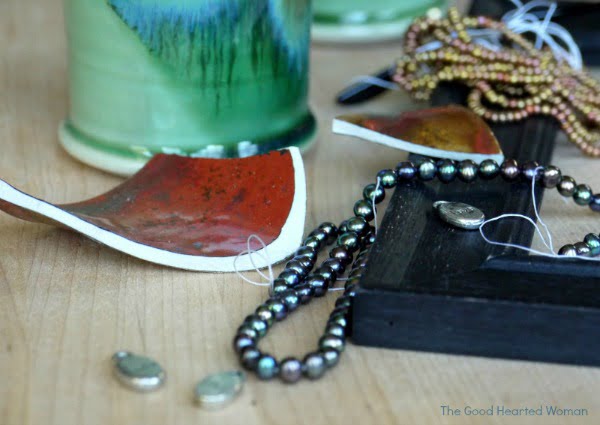
- Buttons, beads, or assorted do-das for embellishing (Totally optional. I used some extras from my beading supplies.)
Tools & Other Stuff:
- Safety goggles!!
- Hammer
- Bag in which to smash things (I like to double-up gallon size Ziploc bags for this step so that I can see what I am doing.)
- Latex gloves (or other gloves if you are allergic to latex)
- Sponge
- Paper towels
- Water
- Put on the safety googles. Really – put them on. Now. You do not want speeding shards of glass or pottery flying into your eyes.
- Put the Object To Be Smashed into the bag.
- Using the hammer, carefully smash the OTBS into large pieces using one intentional blow. This should give you a number of large pieces.
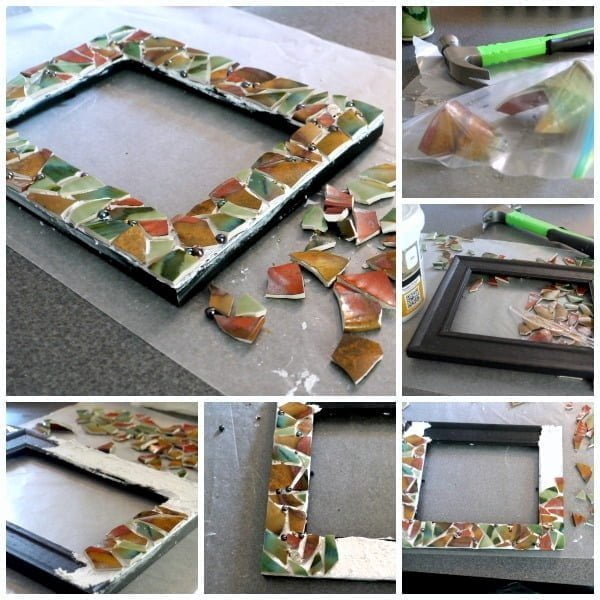
- At this point, I like to take the large pieces out of the bag. Then I put them back in, one at a time, and smash them into smaller pieces, removing the smaller pieces before putting another large piece in the bag. This method yields much better results and more uniform pieces than just smashing everything at once all willy-nilly. It also helps you isolate individual pieces that you want to preserve; for example, I was really careful to preserve the little “Orcas” piece from the artist’s stamp on the bottom so that I could use it in my mosaic. (It’s the little grey piece in the lower right of the fist image.)
- Lay the pieces all out so you can see what you have to work with.
- Use the plastic knife to spread a layer of the adhesive/grout onto the frame. It was quite hot on the day that I made this one, so I only did one small section at a time so that the grout didn’t dry out too soon.
- Put on the latex gloves.
- Place the broken pieces of the Smashed Object onto the grout and press them in a little. (Be careful – there are some sharp edges there!)
- Once you have the frame covered with larger pieces, fill in smaller areas with embellishment items if you wish.
- Allow everything to set up for a few hours.
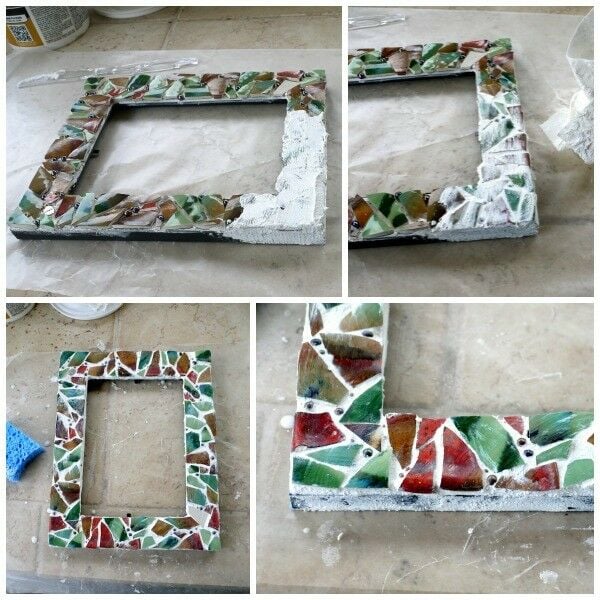
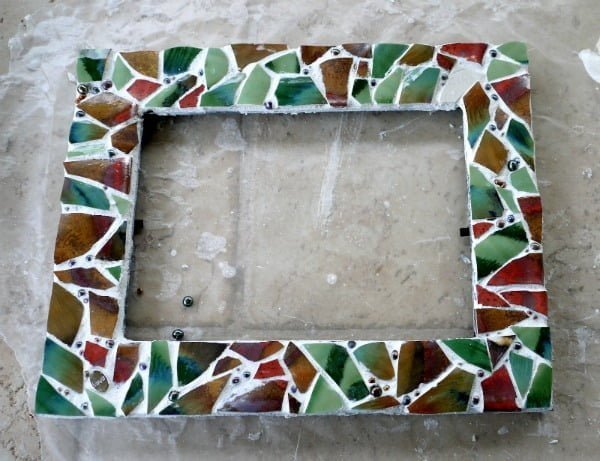
- Put your gloves on again, and work the grout into the spaces between the pieces. (Once again, there are some really sharp edges there, so be careful!!)
- Using a moist sponge, remove all the grout from the smashed object pieces. There will still be a film on them, but you can get most of it this way.
- I usually let it dry for about 20 minutes at this point, and then go in and carefully polish each piece with a paper towel – first wet, then dry. This can take a bit of time, even on a small project, but it is definitely worth the trouble.
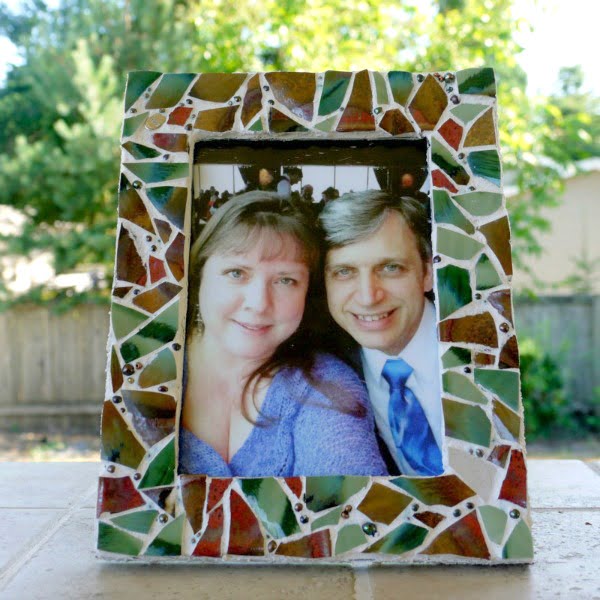
- Let everything dry for 24 hours before using your beautiful new frame.
- If you are making a mosaic on something that may get wet (e.g., serving tray, coffee tabletop) be sure to seal the final project with a grout sealer.
Next time you break a memory (or your kids do), don’t just throw it away – save it!




Mike Preator says
Greetings!
What brand of adhesive and grout did you buy and where from?
Thank you and great job on the frame. Hopefully I can make mine look as good.