Summer is winding down and it’s time to start thinking about how to decorate our porch for Fall. This DIY Fall Wreath is a simple craft and idea for a beautiful seasonal touch. Making your own wreath isn’t as hard as you think. Toni is showing us how she made this DIY Fall Wreath with this simple tutorial! Visit Small Home Soul for more beautiful home diy ideas! You may also enjoy this Coffee Filter Wreath!
Hi Friends, I’m Toni from Small Home Soul and today I’m excited to be here for my first ever guest post. I’m sending a big thank you to Kim for this opportunity to share my creative side with you all today. I’m going to show you how I made my first ever DIY Fall Wreath. It’s a bunch of firsts for me today 🙂
DIY Fall Wreath
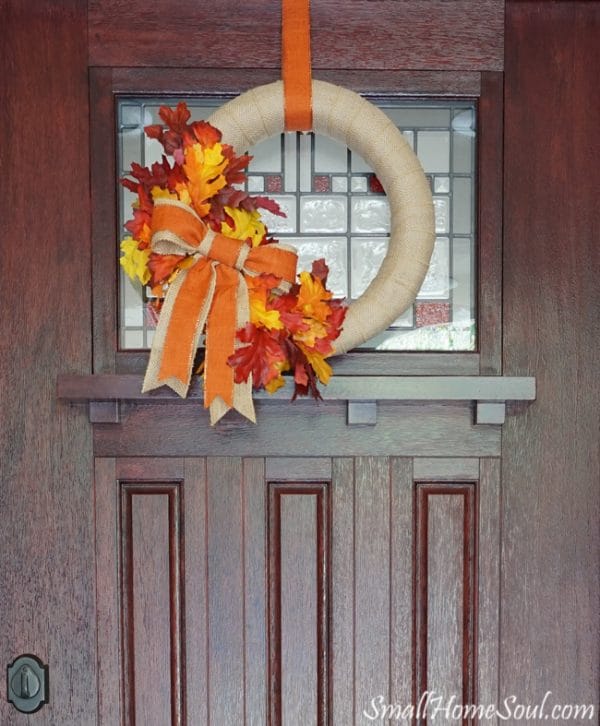
I bet my neighbors think I’m rushing Fall a bit since it’s still pretty warm here in Northern California. But I’m usually a last-minute seasonal decorator so it’s nice to be ahead of the curve for a change. School hasn’t even started for the kids in our area and Halloween stuff is already in the stores. So I think I’m good 😉
DIY Fall Wreath Supplies:
To make your own Burlap DIY Fall Wreath you’ll need the following:
Affiliate links are supplied for your convenience.
- 14″ Straw Wreath Form
- 15-18′ Orange and Burlap Ribbon (2-1/2″ wide)
- Glue Gun & Glue Sticks
- Scissors
- 1 Bunch Silk Fall Leaves
- Wire Cutters
- Bow for Decoration
- Ribbon for Hanging
Start with your burlap ribbon at a bit of an angle since you’ll be wrapping it around the wreath form. Hot glue the end of the ribbon to the wreath form and secure it with a few pins to ensure it’s stays put as you begin wrapping. I used a high heat glue gun this time and it took forever for the glue to dry. I’m impatient, thus the pins.
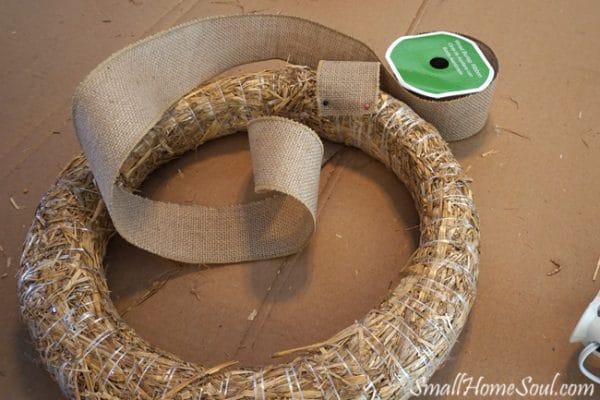
If there are gaps in the ribbon as you wrap just fold them over on the back side of the wreath and keep wrapping. This will keep the front looking smooth. You can see a folds few in the pic below.
My ribbon came in 15′ rolls and one wasn’t quite long enough. I cut off the ribbon that wouldn’t loop around one more time and glued it down on the back. I continued with the second role until the wreath form was fully covered. It took approx 18′ to cover the wreath form.
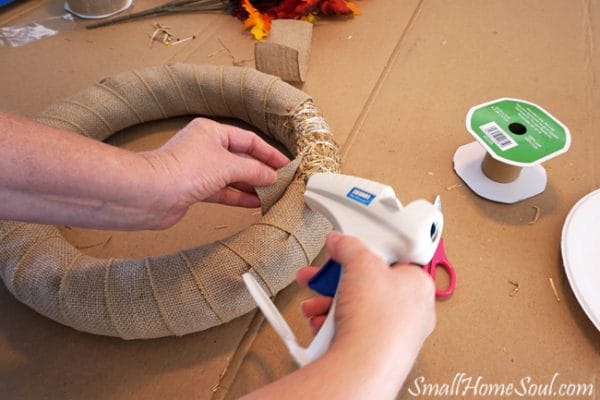
When the wreath form was fully covered I moved on to the leaves. Using the wire cutters I clipped each stem from the bunch. I left them long until I was ready to attach them to my wreath.
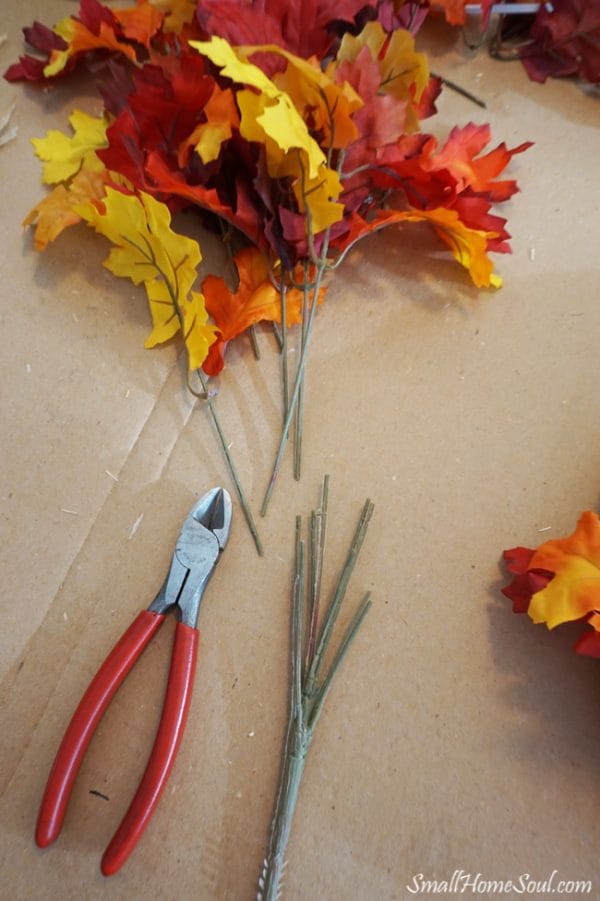
Each stem had two or three bunches of leaves. I pushed each bunch up almost to the end and left a little space between each leaf bunch. After cutting the stem about 1/2″ from the bottom leaf I glued it to the burlap.
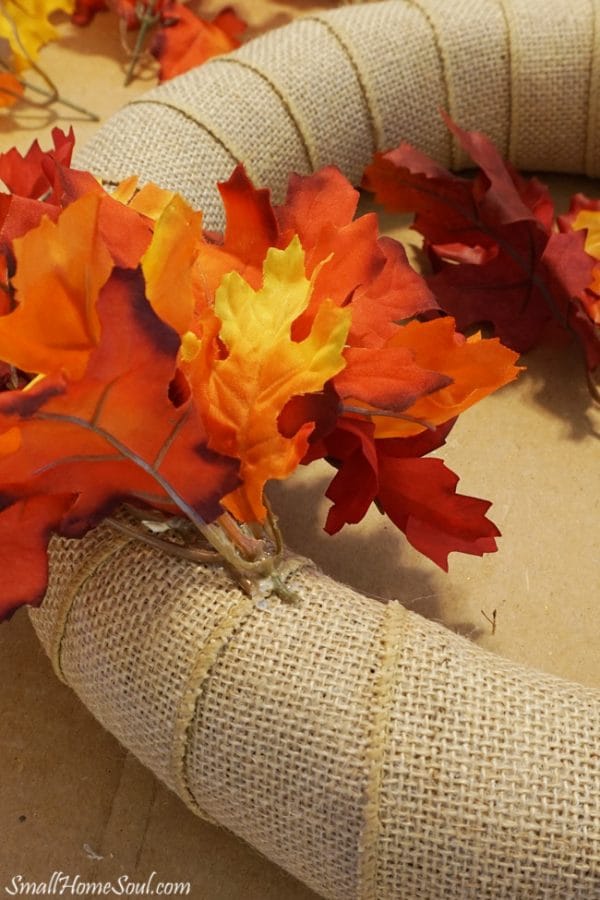
I worked first from left to right, and then right to left until I met in the middle. The stems were glued to about 1/3 of the wreath circle.
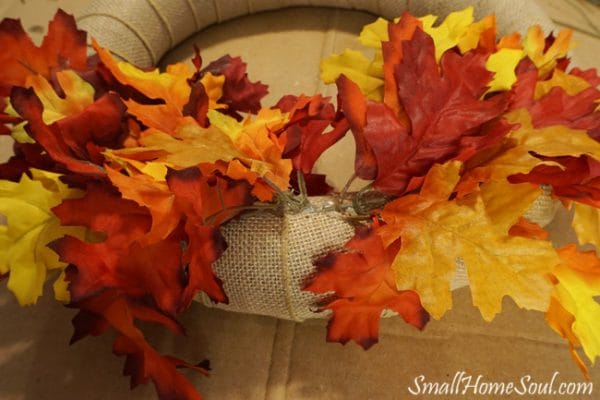
To close up the middle I kept two leaf sets aside with longer stems. This created a pick that I pushed through the burlap and into the straw; I secured them with a dab of hot glue.
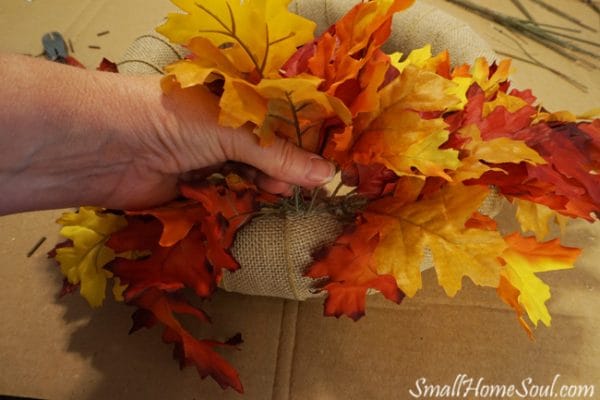
Lastly, I added a decorative bow and hung my new Fall wreath on my front door.
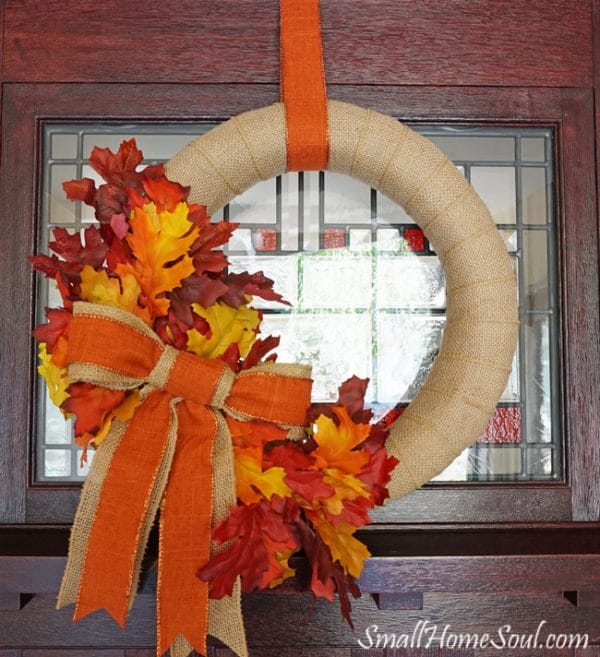
I’m ready for Fall, even if the neighbors think it’s a bit too early 🙂
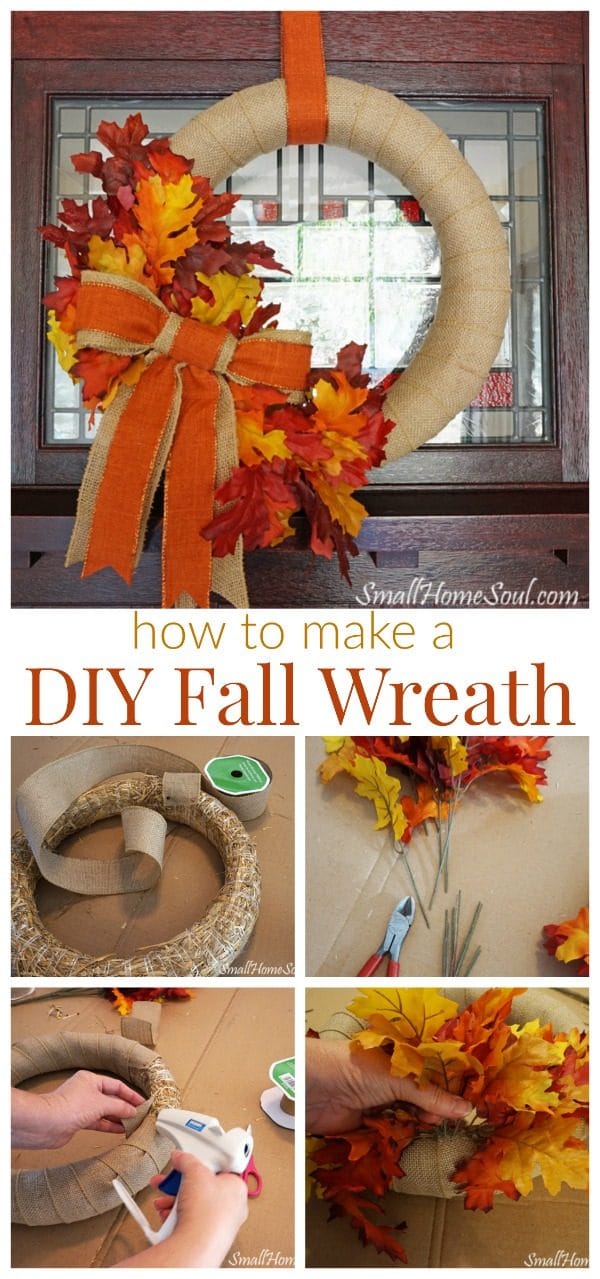
I hope you like my first every Fall wreath!
See my Christmas Monogram Door Hanger.



Jennifer says
Could you embellish with a letter? If so, what would be the best way to do it? I have never made a wreath and am not very craft savvy!
Kim says
Yes, that’s a great idea! I would use craft glue or a hot glue gun if you have it.
FLORENCE @ VintageSouthernPicks says
Hi Kim,
Your wreath is so pretty and colorful! Pinning for future reference.
Kim says
Thank You! Guest poster Toni from Small Home Soul created this beauty!
Jennie says
What a lovely wreath! The weather just changed to “fall” here (at least for today) so it feels fitting to start taking out fall decorations. 🙂 Thanks so much for the tutorial—pinning it now!
Toni | Small Home Soul says
Thank you Jennie I had a lot of fun making my first wreath!