This easy tutorial on How to Paint on Fabric with acrylic craft paint will show you simple tips to create the look you want and how to keep your painted fabric from fading much.
I love making iron-on kitchen towels for quick decorating but have been wanting to try painting stripes on simple cotton flour sack kitchen towels for a while. I didn’t realize that I could use regular acrylic paint on fabric. 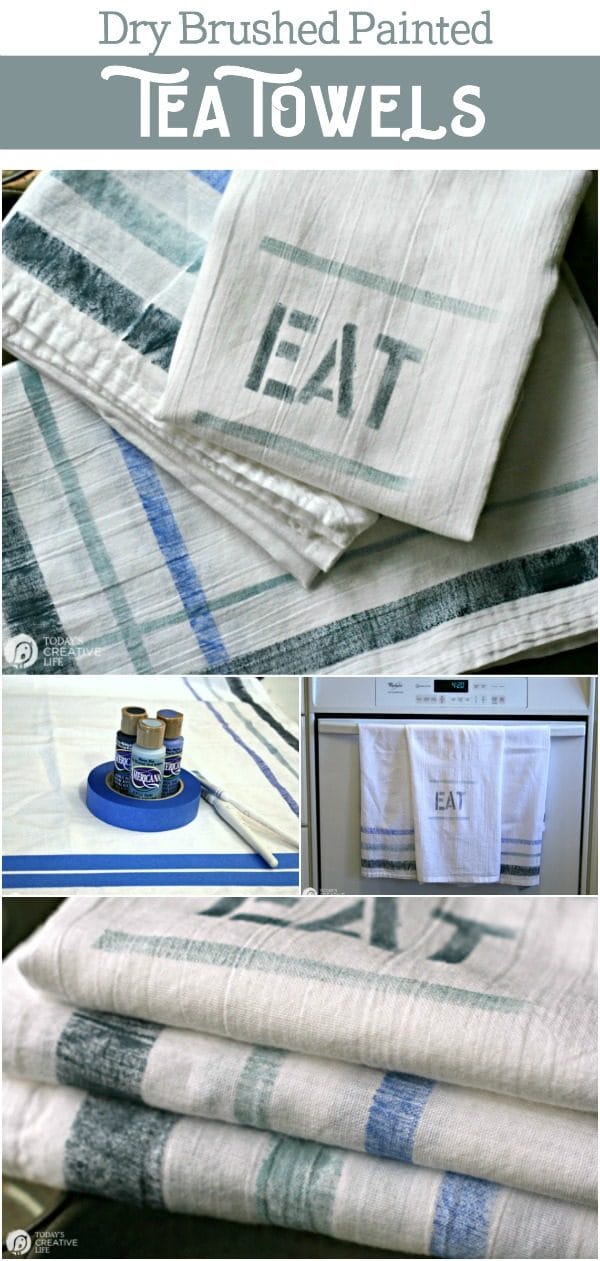 I was thrilled to find out I could! I made the cutest farm style kitchen flour sack towels that will also make the best gifts! These were very very simple after trial and error. Later, I decided to also stencil flour sack towels.
How To Paint on Fabric with Acrylic Paint
My directions on how to paint on fabric are pretty simple.
How To Paint Dish Towels
Learn how to paint on fabric with acrylic paints
Materials
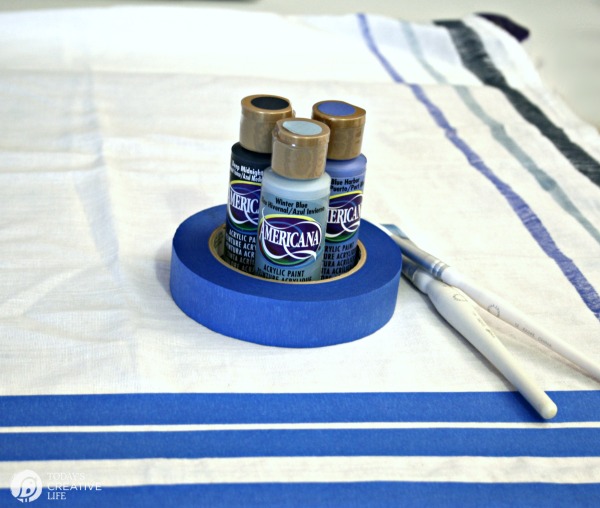
- Painters Tape
- Cotton Tea Towels
- Acrylic Craft Paint
- Stencils if desired
Tools
- Medium Paint Brush (not foam)
Instructions
- Gather your supplies
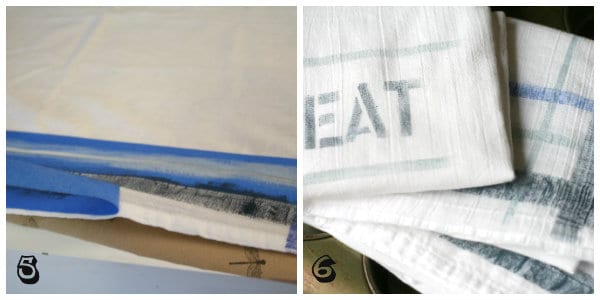
- Spread out your cotton towels on a flat surface and mark your design with your tape or stencils. I did stripes on each end and a couple on each side. (line your surface with something just in case the paint bleeds through. I’ve used an old vinyl plastic table cloth or just kraft paper. You can also use that clingy seal plastic wrap.)

- Water down your paint slightly. Not too runny.

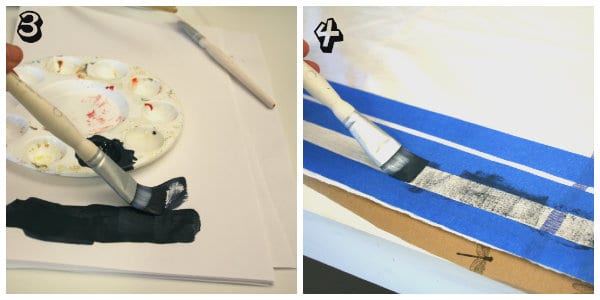
- Prepare your brush for a DRY BRUSH technique by wiping excess paint off your brush onto paper.
- Brush lightly without pressing too hard several times until the desired color appears.

- Peel your tape off as soon as you’re done painting and repeat the other side of the towel.
- Let your towel dry completely before heat setting the paint.
HOW TO HEAT SET PAINTED FABRIC
After your paint is dry, you can place in the dryer on the hottest setting and tumble for 30 min. Or you can set with an iron on it's highest setting. Use another cotton towel over the design and iron. No steam.
How to Heat Set Painted Fabric
I followed the directions suggested by PLAID and used the iron method: Heat setting is recommended for best durability. Allow the painted design to dry overnight. Place the item in a clothes dryer for 30 minutes on the highest setting allowed for the type of fabric used, OR you may heat set the painted piece using a dry iron and a pressing cloth by laying the pressing cloth over the painted fabric and iron the painted design for 10 seconds, lift the iron and move it to another section of the painted design. Your iron should be set at the highest setting allowed for the fabric used.
Can You Wash Painted Fabric?
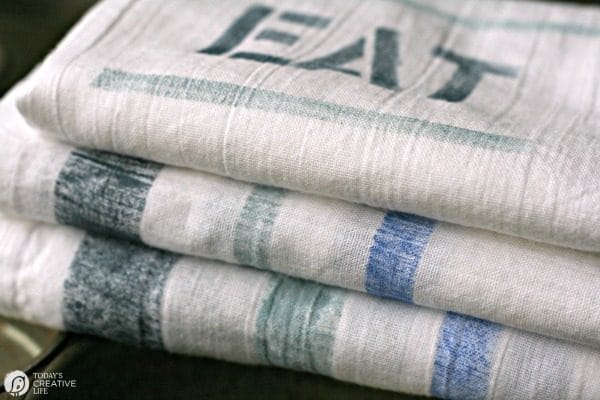
After you’ve set the paint, you can wash on cold and dry normally. They may fade a bit, but you’ll be ok, it only makes them more vintage. 🙂
This project didn’t take a lot of time. The taping is the time-consuming part. I whipped up 6 or 7 towels in about 30 min. The dry brush technique doesn’t give a solid painted look…….I love the worn vintage look. Didn’t I tell you these would make the perfect gift?
How to Keep Paints from Bleeding
Through trial and error, I realized using a foam craft brush loaded way too much paint for the fabric I was using and it created a lot of bleeding.
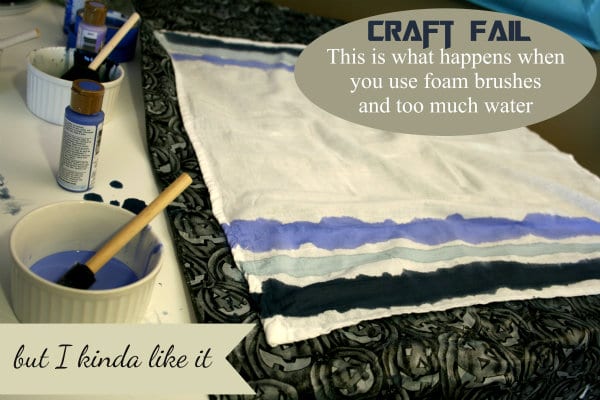
But, as you can see, it was still pretty. Had I not been using simple lines, and wanting a certain design, I am certain it would have been a hot mess.
The dry brush method created the vintage farmhouse flour sack dishtowel look I was going for.
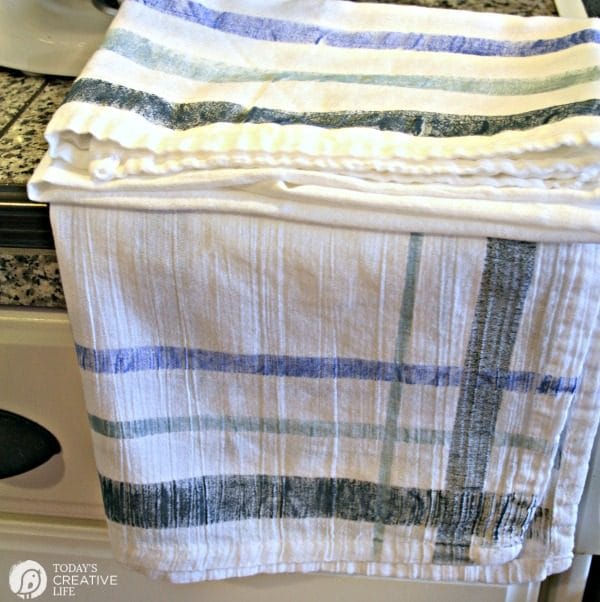
I have to warn you… these are addicting to make.
If you make some, please share and tag me on Instagram!
Home Decorating Crafts
Easy DIY Ideas for decorating your home.
DIY Laboratory Flower Vases
Follow this simple tutorial on how to make these laboratory flower vases.




jody says
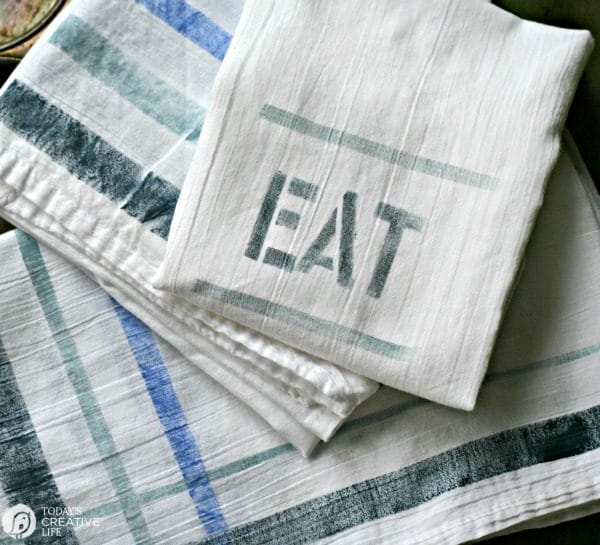
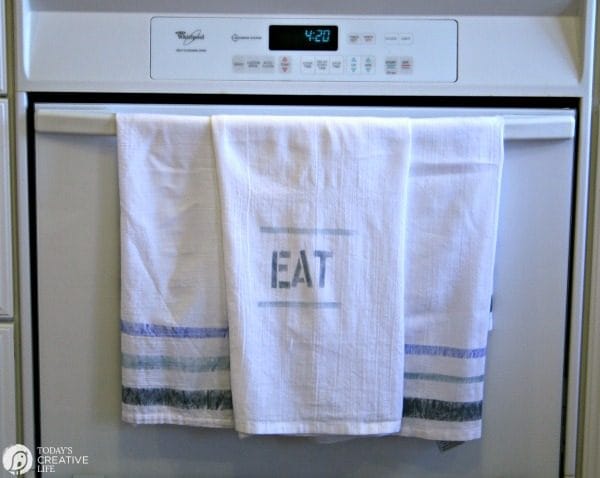
How did you get the word, “eat” on the towel?
Kim says
I used a stencil and dry brushed it.
Aubrey says
Found you via the Made by you Monday link party. Oh do I love fabric painting and this is just adorable!
~Aubrey
Project Lovegood
Gail @http://biblelovenotes.com says
Love those vintage towels, and yours are a great recreation. Thanks for sharing the idea/tutorial
Shabby Chic Home says
Great project!!! Love it!
jet says
I have seen more of this not online, but i didn’t think of it anymore, i love the more floading paint lines as well.
thank you for reminding me of it, and the sharing of this greate tute;-D
TidyMom says
So fun and cute Kim!!
Betsy @ Anna Nimmity says
These are so cool! Definitely my kind of project. I’ll be pinning now. 🙂
Beckie says
Ok I LOVE the Blue, the stripes, the Eat….. These turned out super ober cute! Sharing with my FB peeps today.
nik says
Superfun project! You could paint a plain white apron to match too!
Cheers!
Wendy says
The towels didn’t come out “crunchy” where the paint was applied?
Kim says
Only the Craft Fail one is crunchy…..I haven’t washed it yet. The others are all soft because the paint isn’t over saturated and it remained soft after laundering. I’ve also read that running a hot iron over them before washing may also help preserve the color.
Wendy says
Thanks for the extra info!